

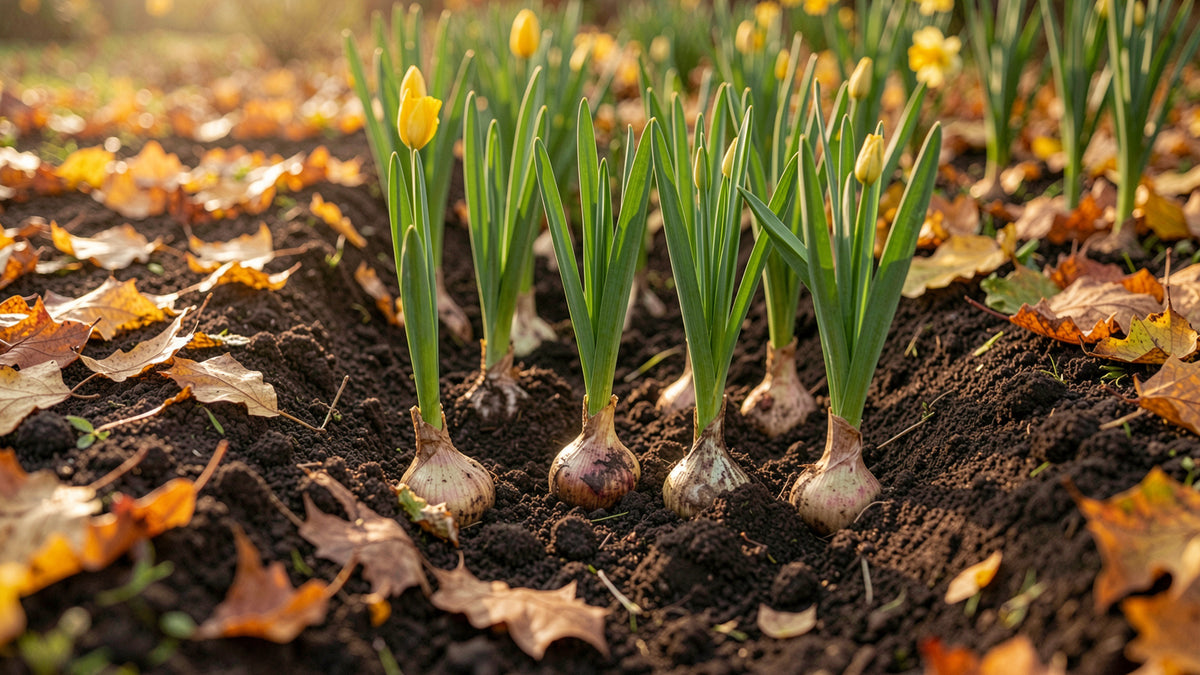
The best bulb fertilizer for fall planting is a liquid biological amendment rather than dry granular fertilizer or bone meal. Dormant bulbs need available phosphorus and mycorrhizal fungi delivered right across the basal plate to anchor roots before the ground freezes. A diluted trench drench of liquid compost establishes those root networks without attracting digging rodents or scorching new tissue with fertilizer salts.
When you stand in the autumn garden with bags of tulip or daffodil bulbs, dropping a handful of dry powder into every hole feels instinctive. Bulb establishment, however, operates on a specific biological schedule. Selecting bulb nutrition at fall planting is not about pushing leafy top growth that will freeze in December. It is about encouraging root tissue to colonize the surrounding soil while the ground still holds lingering autumn warmth.
The Fall Rooting Window Before Ground Freeze
Flowering bulbs are geophytes. They carry a compressed basal plate at the base from which roots extend downward, while flower buds remain nestled inside fleshy protective scales. Dormant bulbs placed into autumn soil do not wait until spring to begin development. They enter an active establishment phase that requires soil temperatures between 40 and 55 degrees Fahrenheit.
During this window, the basal plate pushes out initial root nubs that must elongate and anchor into the dirt. This root system absorbs soil moisture and minerals before sustained winter ground freeze halts growth. If soil temperatures fall below 40 degrees before bulbs root, they sit loose in cold mud. Unanchored bulbs frequently suffer from frost heaving, where repeating winter freeze-thaw cycles push the bulbs up to the surface, leaving them exposed to desiccating winds and freezing air.
Why Bone Meal Fails Modern Spring Bulb Beds
Unrefined bone meal was the standard fall amendment decades ago, but modern horticultural conditions are different. Commercially processed, steamed bone meal provides far less accessible nutrition than older raw blends, yet it retains an intense animal odor. Foraging raccoons and dogs easily track that scent, turning freshly planted trenches into digging targets overnight.
The chemistry of dry bone meal also fails in cold weather. Granular phosphorus has exceptionally low soil mobility, moving less than an inch per season on its own through cold soil. When you place dry powder under a bulb, emerging roots cannot use it until they contact the granules directly. High concentrations of dry fertilizer salts can burn tender root nubs as they emerge. Fall bulbs do not need high-nitrogen fertilizers that push soft leaves ahead of a hard freeze. They need soluble, biologically active phosphorus and living soil biology delivered directly across the basal plate in liquid form.
Bed Preparation and Soil Chemistry Checklist
Preparing the planting site correctly prevents fungal rot and nutrient lockup before you plant.
Test Bed pH to Maintain the 5.8 to 6.5 Range
Spring-flowering bulbs perform best within a moderately acidic to neutral pH range of 5.8 to 6.5, as noted in planting guidelines from the Franklin County Center at N.C. Cooperative Extension (2025). When soil drops below 5.8, calcium uptake stalls, which weakens shoot cell walls and locks phosphorus into unavailable forms. In regions with acidic soils, an autumn soil test indicates whether a light lime application is needed before late-November planting. Adding a conditioner like Organic Liquid Humic Acid helps buffer mineral exchange and improves overall nutrient availability across the root zone.
Why this matters: Soil outside the 5.8 to 6.5 range binds critical nutrients, leaving flower buds stunted or prone to bud blast in early spring.
Incorporate Crushed Gravel Barriers Against Burrowing Voles
Line the base and lower perimeter of your planting trench with a half-inch layer of coarse, sharp crushed stone or brick chips. Squirrels dig from above, but burrowing voles tunnel underground and eat through entire drifts of crocus and tulip bulbs from below.
Why this matters: Coarse stone creates an impenetrable physical barrier that burrowing rodents cannot dig through, protecting your beds without chemical baits.
Discard Spongy or Moldy Basal Plates Before Trenching (Most Skipped)
Examine the basal plate of every bulb before it goes into the ground. Healthy plates feel firm and woody. If the plate yields under light thumb pressure or shows blue-green mold, throw the bulb into the trash immediately.
Why this matters: A single decaying bulb spreads fungal rot through wet soil, infecting nearby healthy bulbs across a communal trench throughout the winter.
Bulb Depth and Trench Spacing Checklist
Proper planting depth shields bulbs from temperature swings and preserves plant energy.
Bury Bulbs at Two to Three Times Bulb Height
A reliable rule of thumb is to dig trenches to a depth equal to two to three times the vertical height of the bulb. For standard tulips and daffodils measuring two inches tall, dig down four to six inches. Smaller bulbs like crocus and snowdrops need shallower planting depths of two to three inches.
Why this matters: Shallow planting leaves bulbs vulnerable to midwinter freeze-thaw heaving, while burying them too deep drains carbohydrate stores before shoots break through the surface.
Maintain Three to Four Inch Spacing in Clustered Drifts
Space large bulbs roughly three to four inches apart when designing naturalized drifts. Small bulbs can sit two inches apart. Avoid packing bulbs tightly against one another in single-file lines.
Why this matters: Proper spacing prevents developing roots from competing for moisture and ensures adequate air circulation around crowns once foliage emerges in spring.
Seat Basal Plates Flat Against Compacted Trench Beds
Tamp down the loose soil at the bottom of the trench with your trowel to form a firm, flat base before setting the bulbs upright. Rest each bulb flat against this compacted floor.
Why this matters: Basal plates resting over loose open pockets dry out quickly, preventing developing root nubs from drawing soil moisture.
Liquid Inoculation and Basal Plate Feeding Checklist
Liquid biological amendments provide immediate nutrients without the drawbacks of dry powders.
Drench the Open Trench with Diluted Liquid Compost
Mix two to four ounces of Root Ruckus Liquid Compost per gallon of clean water in a watering can. Before backfilling any soil, apply the solution generously across the floor of the planting trench to soak the soil bed and coat the lower halves of the bulbs.
Why this matters: Liquid compost carries active mycorrhizae and bioavailable phosphorus directly to root tissue, avoiding the slow movement of dry granular amendments.
Ensure Direct Fluid Contact Along Every Basal Plate (Most Skipped)
Direct the spout of your watering can so the drench runs down the side of the bulbs and coats the basal ring. Do not merely mist the surrounding soil. The liquid must saturate the transition zone where root nubs sprout.
Why this matters: Mycorrhizal fungi must colonize emerging root tissue during initial hydration to build root vigor and disease resistance before freezing weather arrives.
Backfill with Native Soil Free of Raw Organic Pockets
Fill the trench with excavated native soil broken into a fine tilth. Never shovel uncomposted manure or raw leaves directly into the trench around dormant bulbs.
Why this matters: Decomposing raw matter creates cold, anaerobic pockets against bulb scales, trapping excess moisture and encouraging winter crown rot.
Post-Planting Moisture and Winter Freeze Checklist
Moisture management after backfilling determines whether bulbs stay healthy through winter.
Saturate Backfilled Trenches to Collapse Air Pockets
Give the entire planting area a thorough, deep soaking right after leveling the topsoil. Apply enough water to reach the full depth of the trench floor.
Why this matters: This soaking collapses dry air pockets between soil clods, locks scales against moist earth, and triggers immediate root development.
Withhold Mulch Layers Until the Top Soil Crust Freezes (Most Skipped)
Keep the surface of the bulb bed bare through October and early November. Do not spread protective winter mulch until the top two inches of garden soil freeze lightly.
Why this matters: Mulching at planting time traps lingering soil heat, which delays root establishment and creates a sheltered nesting site for mice.
Monitor Winter Soil Drainage to Prevent Waterlogging
Check the bulb beds after heavy late-autumn rains to make sure water drains away cleanly. When preparing surrounding beds and lawn areas for winter, you can coordinate your bulb work with a seasonal winterizer fertilizer program to support overall root vigor across your landscape.
Why this matters: Standing water displaces oxygen in cold soil, causing dormant bulbs to rot before spring arrival.
What to Do If a Planting Check Fails
Autumn weather shifts or planting mistakes can disrupt your schedule. When unexpected conditions arise, address them with targeted adjustments rather than leaving bulbs unprotected.
Remedying Heavy Waterlogged Clay with Organic Drainage Amendments
If you encounter sticky, dense subsoil clay that holds standing water, adjust the trench depth and soil profile:
- Excavate your planting trench two inches deeper than the standard recommendation.
- Spread a one-inch layer of coarse sharp sand or crushed granite chips along the trench bottom to establish an internal drainage sump.
- Blend equal parts native soil with fine composted material before backfilling, ensuring moisture drains away from dormant scales rather than ponding.
Rescuing Late Shipments When Topsoil Has Already Crusted
When an unexpected freeze crusts the ground before your bulbs are in the dirt, you can still save the planting window:
- Use a flat-edge spade or pick mattock to break through the frozen surface crust.
- Dig down into the warmer, workable soil beneath, seat your bulbs firmly on their basal plates, and apply your liquid compost drench at room temperature.
- Backfill with dry, unfrozen topsoil, then cover the bed immediately with four inches of straw to insulate the soil and allow delayed rooting.
Responding to Disturbed Beds After Early Rodent Digging
When nocturnal foragers disturb a freshly planted bed, act quickly to protect the remaining planting:
- Inspect the disturbed area and retrieve dislodged bulbs.
- Examine the basal plates for gnaw marks, discarding any damaged specimens with compromised basal tissue.
- Replant sound bulbs at their correct depth, backfill firmly, and lay a sheet of half-inch wire hardware cloth over the bed, securing it with landscape staples before applying late-season mulch.
Frequently Asked Questions
Should you put bone meal in the hole when planting bulbs?
Avoid placing modern steamed bone meal into planting holes. Bone meal acts as a scent beacon for scavenging raccoons and rodents, while its dry phosphorus moves less than an inch per season in cold autumn soil. Drenching the trench with a liquid biological amendment delivers mobile nutrition without attracting pests.
Can you fertilize bulbs with liquid fertilizer at planting time?
Yes, drenching planting trenches with a gentle liquid compost delivers mycorrhizae and bioavailable phosphorus directly across the basal plate. Liquid formulations bypass the slow travel time of dry inputs and will not scorch delicate root tips with harsh fertilizer salts.
Do you water bulbs immediately after planting them in autumn?
Always soak bulb beds thoroughly right after backfilling, even if the autumn air feels damp. This initial watering collapses dry air pockets around the basal plate, creates direct soil contact, and triggers immediate root development before the ground freezes solid.
What causes newly planted spring bulbs to rot in the ground over winter?
Bulb rot is primarily caused by poorly drained soil, placing bulbs against raw uncomposted manure that creates anaerobic fungal pockets, or planting stock with infected basal plates. Ensuring sharp drainage and using clarified liquid compost prevents these scale infections.
How deep should you plant tulip and daffodil bulbs in the fall?
Plant bulbs at a depth equal to two to three times their vertical height. For standard tulips and daffodils measuring about two inches tall, this means digging planting trenches between four and six inches below the finished soil surface.
Share:
Liquid Soil Aeration vs Core Aeration: Which Softens Clay?
Organic Fish Fertilizer: Application Rates and Odor Guide